
SwiftGL
Hello Window
Let’s see if we can get GLFW up and running. First, create a main.swift file and add the following imports and constants to the top of your newly created file. The filename must be all lowercase and must be exactly main.swift or it won’t work.
import CGLFW3
import SGLOpenGL

let WIDTH:GLsizei = 800, HEIGHT:GLsizei = 600
Next, we create the main function where we will instantiate the GLFW window:
func main()
{
    glfwInit()
    defer { glfwTerminate() }

    glfwWindowHint(GLFW_CONTEXT_VERSION_MAJOR, 3)
    glfwWindowHint(GLFW_CONTEXT_VERSION_MINOR, 3)
    glfwWindowHint(GLFW_OPENGL_PROFILE, GLFW_OPENGL_CORE_PROFILE)
    glfwWindowHint(GLFW_RESIZABLE, GL_FALSE)
    glfwWindowHint(GLFW_OPENGL_FORWARD_COMPAT, GL_TRUE)
}
In the main function we first initialize GLFW with glfwInit. Because GLFW is a C program, we have to manage its resource allocations manually. The GLFW documentation tells us that glfwTerminate will release anything grabbed by glfwInit. The Swift defer block will execute its contents when the function ends, regardless of how it ends. It doesn’t matter if you return, throw, or fall off the end, the defer blocks always run. Putting glfwTerminate in a defer block is the ideal way to handle cleanup. Not only do you get the execution guarantee, having the allocation and free always next to each other makes your code more maintainable.
Now we can configure GLFW using glfwWindowHint. The first argument of glfwWindowHint tells us what option we want to configure, where we can select the option from a large enum of possible options prefixed with GLFW_. The second argument is an integer that sets the value of our option. A list of all the possible options and its corresponding values can be found at GLFW’s window handling documentation.
Since the focus of this website is on OpenGL version 3.3 we’d like to tell GLFW that 3.3 is the OpenGL version we want to use. This way GLFW can make the proper arrangements when creating the OpenGL context. This ensures that when a user does not have the proper OpenGL version GLFW fails to run. We set the major and minor version both to 3. We also tell GLFW we want to explicitly use the core-profile and that the window should not be resizable by a user. Telling GLFW explicitly that we want to use the core-profile will result in invalid operation errors whenever we call one of OpenGL’s legacy functions, which is a nice reminder when we accidentally use old functionality where we’d rather stay away from. We’ll go one step further by enabling GLFW_OPENGL_FORWARD_COMPAT to ensure all functions deprecated in the requested OpenGL version are removed.
Next we’re required to create a window object. This window object holds all the windowing data and is used quite frequently by GLFW’s other functions.
let window = glfwCreateWindow(WIDTH, HEIGHT, "LearnSwiftGL", nil, nil)
glfwMakeContextCurrent(window)
guard window != nil else
{
    print("Failed to create GLFW window")
    return
}
The glfwCreateWindow function requires the window width and height as its first two arguments respectively. The third argument allows us to create a name for the window; for now we call it “LearnSwiftGL” but you’re allowed to name it however you like. We can ignore the last 2 parameters. The function returns a GLFWwindow object that we’ll later need for other GLFW operations. After that we tell GLFW to make the context of our window the main context on the current thread.
Viewport
Before we can start rendering we have to do one last thing. We have to tell OpenGL the size of the rendering window so OpenGL knows how we want to display the data and coordinates with respect to the window. We can set those dimensions via the glViewport function. Notice that this function starts with “gl” instead of “glfw”. Indeed, this is your very first OpenGL command.
glViewport(x: 0, y: 0, width: WIDTH, height: HEIGHT)The first two parameters set the location of the lower left corner of the window. The third and fourth parameter set the width and height of the rendering window, which is the same as the GLFW window. We could actually set this at values smaller than the GLFW dimensions; then all the OpenGL rendering would be displayed in a smaller window and we could for example display other elements outside the OpenGL viewport.
Behind the scenes OpenGL uses the data specified via glViewport to transform the 2D coordinates it processed to coordinates on your screen. For example, a processed point of location (-0.5,0.5) would (as its final transformation) be mapped to (200,450) in screen coordinates. Note that processed coordinates in OpenGL are between -1 and 1 so we effectively map from the range (-1 … 1) to (0 ..< 800) and (0 ..< 600).
Game loop
We don’t want the application to draw a single image and then immediately quit and close the window. We want the application to keep drawing images and handling user input until the program has been explicitly told to stop. For this reason we have to create a while loop, that we now call the game loop, that keeps on running until we tell GLFW to stop. The following code shows a very simple game loop:
while glfwWindowShouldClose(window) == GL_FALSE
{
    glfwPollEvents()

    glClearColor(red: 0.2, green: 0.3, blue: 0.3, alpha: 1.0)
    glClear(GL_COLOR_BUFFER_BIT)

    glfwSwapBuffers(window)
}
The glfwWindowShouldClose function checks at the start of each loop iteration if GLFW has been instructed to close, if so, the function returns GL_TRUE and the game loop stops running, after which we can close the application.
The glfwPollEvents function checks if any events are triggered (like keyboard input or mouse movement events) and calls the corresponding functions (which we can set via callback methods). We usually call event processing functions at the start of a loop iteration.
The glClearColor and glClear will erase the color buffer (a large buffer that contains color values for each pixel in GLFW’s window). If we don’t erase this buffer, what you see in the window will be random. It could be black or it could be something another program displayed and didn’t clear. As you might recall, OpenGL works as a state machine. Calling glClearColor changes the state and glClear causes an action that uses the ClearColor state.
The glfwSwapBuffers will swap the color buffer that has been used to draw in during this iteration and show it as output to the screen. When we do more interesting renders, we’ll be adding code immediately after we clear the buffer and before we swap it to the screen.
Double buffer
When an application draws in a single buffer the resulting image might display flickering issues. This is because the resulting output image is not drawn in an instant, but drawn pixel by pixel and often from left to right and top to bottom. Because these images are not displayed at an instant to the user, but rather via a step by step generation the result may contain quite a few artifacts. To circumvent these issues, windowing applications apply a double buffer for rendering. The front buffer contains the final output image that is shown at the screen, while all the rendering commands draw to the back buffer. As soon as all the rendering commands are finished we swap the back buffer to the front buffer so the image is instantly displayed to the user, removing all the aforementioned artifacts.
Running main()
In Swift, main.swift is a special kind of file that runs all of its content like a script. We want to write programs consisting of many files, not single file scripts, so we’ll be consistent and write everything in main.swift the same as every other file. Except nothing would run if we do this so we need one single line that calls the function where our program starts. The following must always be the last line in main.swift for all of these tutorials.
main()While adding new content, be careful to keep this at the end of the file.
Building and running
Create a Package.swift with the following contents. Be sure to use a capital “P” here. It needs to be in the same folder as main.swift (which is a lowercase “m”). This file tells the Swift Package Manager what you want to build.
import PackageDescription

let package = Package(
    name: "main",
    dependencies: [
        .Package(url: "https://github.com/SwiftGL/OpenGL.git", majorVersion: 1),
        .Package(url: "https://github.com/SwiftGL/Math.git", majorVersion: 1),
        .Package(url: "https://github.com/SwiftGL/Image.git", majorVersion: 1)
    ]
)

#if os(Linux)
    package.dependencies.append(
        Package.Dependency.Package(url: "https://github.com/SwiftGL/CGLFW3Linux.git", majorVersion: 1)
        // If your distro renamed the library to "glfw" (no 3) use this instead:
        // Package.Dependency.Package(url: "https://github.com/SwiftGL/CGLFWLinux.git", majorVersion: 1)
    )
#else
    package.dependencies.append(
        Package.Dependency.Package(url: "https://github.com/SwiftGL/CGLFW3.git", majorVersion: 1)
    )
#endif
There’s only two things of interest in this file. The name is the name you want for the compiled executable; we are using main. The dependencies are git repositories with Swift modules that your program depends on. You may notice that we’re not using Math and Image yet, but we will soon. They are included here since we’ll use this same build script for every tutorial project.
If you have problems getting Swift to link GLFW or other Linux dependencies, you may need to edit module.modulemap in the CGLFW* package. The link "something" lines are equivalent to -lsomething from the command line.
You can now build the program with swift build -Xcc -I/usr/local/include -Xlinker -L/usr/local/lib. Change the paths if GLFW was installed somewhere else. It may take a couple minutes to fetch the dependencies and compile them for the first time. If you don’t get any errors, you can run the program with .build/debug/main.
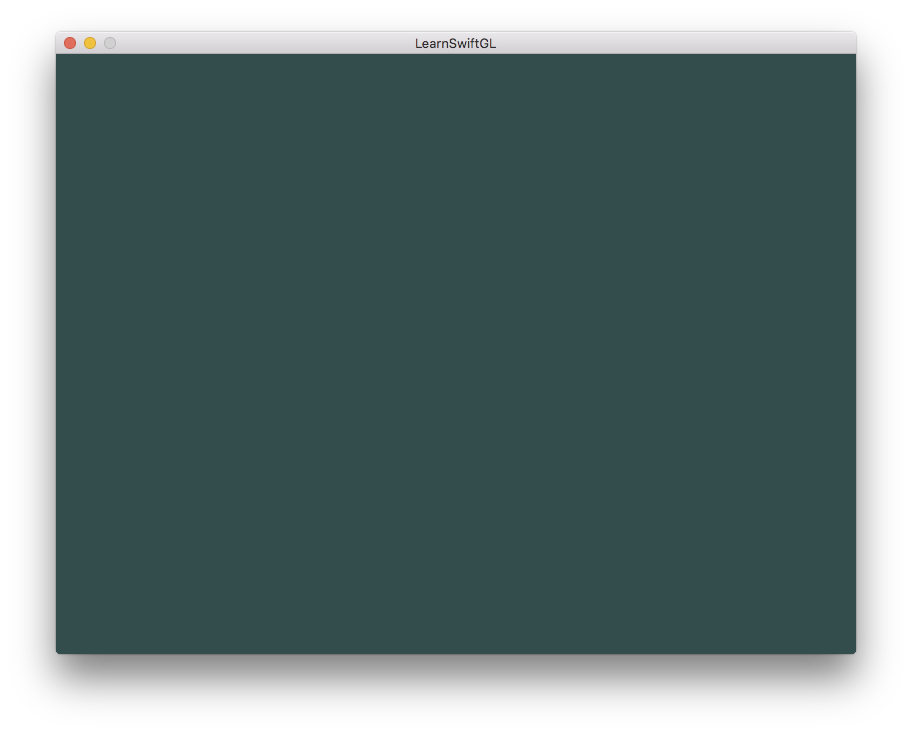
If it’s a very dull and boring green window, you did things right! If you didn’t get the right image or you’re confused as to how everything fits together, check the full source code here.
You can build and run with one command.
swift build -Xcc -I/usr/local/include -Xlinker -L/usr/local/lib && .build/debug/main
Input
We also want to have some form of input control and we can achieve this using GLFW’s callback functions. You provide a callback function that GLFW can call at an appropriate time. One of those callback functions that we can set is the KeyCallback function, which is called whenever the user interacts with the keyboard. The prototype of this function is as follows:
typealias GLFWkeyfun = (COpaquePointer, Int32, Int32, Int32, Int32) -> VoidIf you’re new to Swift you may not have come across COpaquePointer yet. This is a void * in C. It’s easy to forget that GLFW is a C program since Swift does a nice job translating everything. In C programming, void * is used like Any? in Swift, except there’s no safety.
Knowing a little C is helpful, but you don’t need to stop here to go learn. You already made a COpaquePointer when you called glfwCreateWindow. That gets passed to the KeyCallback function so you know what window received the event (so you can use the same function for multiple windows in your program).
func keyCallback(window: COpaquePointer, key: Int32, scancode: Int32, action: Int32, mode: Int32)
{
    if (key == GLFW_KEY_ESCAPE && action == GLFW_PRESS) {
        glfwSetWindowShouldClose(window, GL_TRUE)
    }
}
Our keyCallback function takes a GLFWwindow as its first argument, an integer that specifies the key pressed, an action that specifies if the key is pressed or released, and an integer representing some bit flags to tell you if shift, control, alt or super keys have been pressed. Whenever a user pressed a key, GLFW calls this function and fills in the proper arguments for you to process.
In our newly created keyCallback function we check if the key pressed equals the escape key and if it was pressed (not released) we close GLFW by setting its WindowShouldClose property to true using glfwSetwindowShouldClose. The next condition check of the main while loop will then fail and the application closes.
The last thing left to do is register the function with the proper callback via GLFW. Add this to the main() function:
glfwSetKeyCallback(window, keyCallback)There are many callbacks we can set to register our own functions. For example, we can make a callback function to process window size changes, to process error messages, etc. We register the callback functions after we’ve created the window and before the game loop is initiated.
If you run the program now you will be able to exit by pressing the escape key. The full source code of the application can be found here.
So right now we got everything ready to fill the game loop with lots of rendering calls, but that’s for the next tutorial. I think we’ve been rambling long enough here.